


Jun 7, 2012

Tin Foil Dinners


I was reintroduced to these on Christmas Eve. I remember having tin-foil dinners before, but I had forgotten how fun and yummy they were. It was our first Christmas in the Caribbean, without snow. We met some friends at the beach for lunch, where sand angels were a fun alternative to snow angels! My friend Nicole brought tin-foil dinners. They tasted so yummy. It was like a Sunday dinner all wrapped up together. I was raving about how amazing these tasted and she was telling me how easy they were to put together. I was inspired to come up with my own version of tin foil dinners. It has become a favorite meal for our family to take and eat by the beach while watching the sunset on the ocean. It is the perfect meal to take to the beach or on a picnic or obviously camping. They are individually wrapped in foil, so they are actually stay hot for a while, after coming out of the oven.


Tin Foil Dinners

Makes 10-12 dinners

2 lbs. ground beef
1 medium sized onion (or 2 small onions), chopped
3 cloves garlic, minced
1 package Lipton Beefy Onion Soup Mix
1/4 cup ketchup
2 tablespoons A-1 steak sauce
1 tablespoon Wochestershire sauce
1/2 cup cheddar cheese, shredded
2 teaspoons spicy brown mustard
salt
pepper
6-8 carrots, sliced
red potatoes, quartered (I used one potatoe for each dinner)


Preheat oven to 400 degrees. Cut tin foil into 10- 12, one foot squares. Lay squares of foil out.

Quarter potatoes and slice carrots. Set aside.

Combine ground beef, onion, garlic, onion soup mix, ketchup, steak sauce, Worchestershire sauce, cheese, mustard, salt, pepper. Shape into patties and place on foil squares. Add potatoes and carrots over the patties and sprinkle with salt and pepper. Wrap dinners closed. Place in hot oven and cook for about 45 minutes to an hour or until meat is cooked all the way through and vegetables are tender. Enjoy with ketchup or hot sauce!


Pin It!

Jun 4, 2012

Homemade Tortilla Tutorial


I was asked the question a few days ago, what my favorite food cuisine was? Hands down, without thinking- MEXICAN! Tacos are one of my favorite meals, ever. You know a good fresh fish taco with a nice creamy cilantro lime sauce wrapped up in a delicious homemade tortilla. Ah, tortillas- homemade, soft, warm tortillas! These tortillas are the thing that make those delectible tacos so amazing. Now, I do purchase store bought torillas on occasion when I am in a time crunch. But I am telling you there is just no comparison. These are hands down better than any tortilla you can buy in a bag. And they are worth taking the time to make them. If you are going for a "wow factor" make these the next time you make tacos! YUM!

I had never made homemade tortillas before moving to the Caribbean. We live on a small little island where you pay a pretty penny for store bought tortillas. Now, while living on a med-school budget can be challenging at times (especially living in a place where everything is 2x more expensive), it does have it's upside. This is when I was forced introduced to making homemade tortillas. And I am so glad I was. I got the recipe from my friend Kristen, who took me in and showed me what I had been missing my whole life. And now I just can't imagine my life with out them. Seriously, these babies are life changing! Make them! Your family will be forever grateful!


Homemade Tortillas


3 cups flour
2 teaspoon baking powder
1 teaspoon salt
4-6 tablespoons shortening
1 1/4 cups warm water

In a large bowl, combine flour, baking powder and salt. Cut in shortening using a pastry blender or a fork. (I will continue to use a fork while my pastry blender sits in storage. One day we will be reunited!)  Add warm water and knead for about 8 minutes. You can see a difference in the dough after you knead it. It has almost looks shiny and smooth. Cover and let dough sit for about 10- 15 minutes. 

Roll into a ball just a little bigger than a gold ball, flaten, then roll out on a floured surface. 

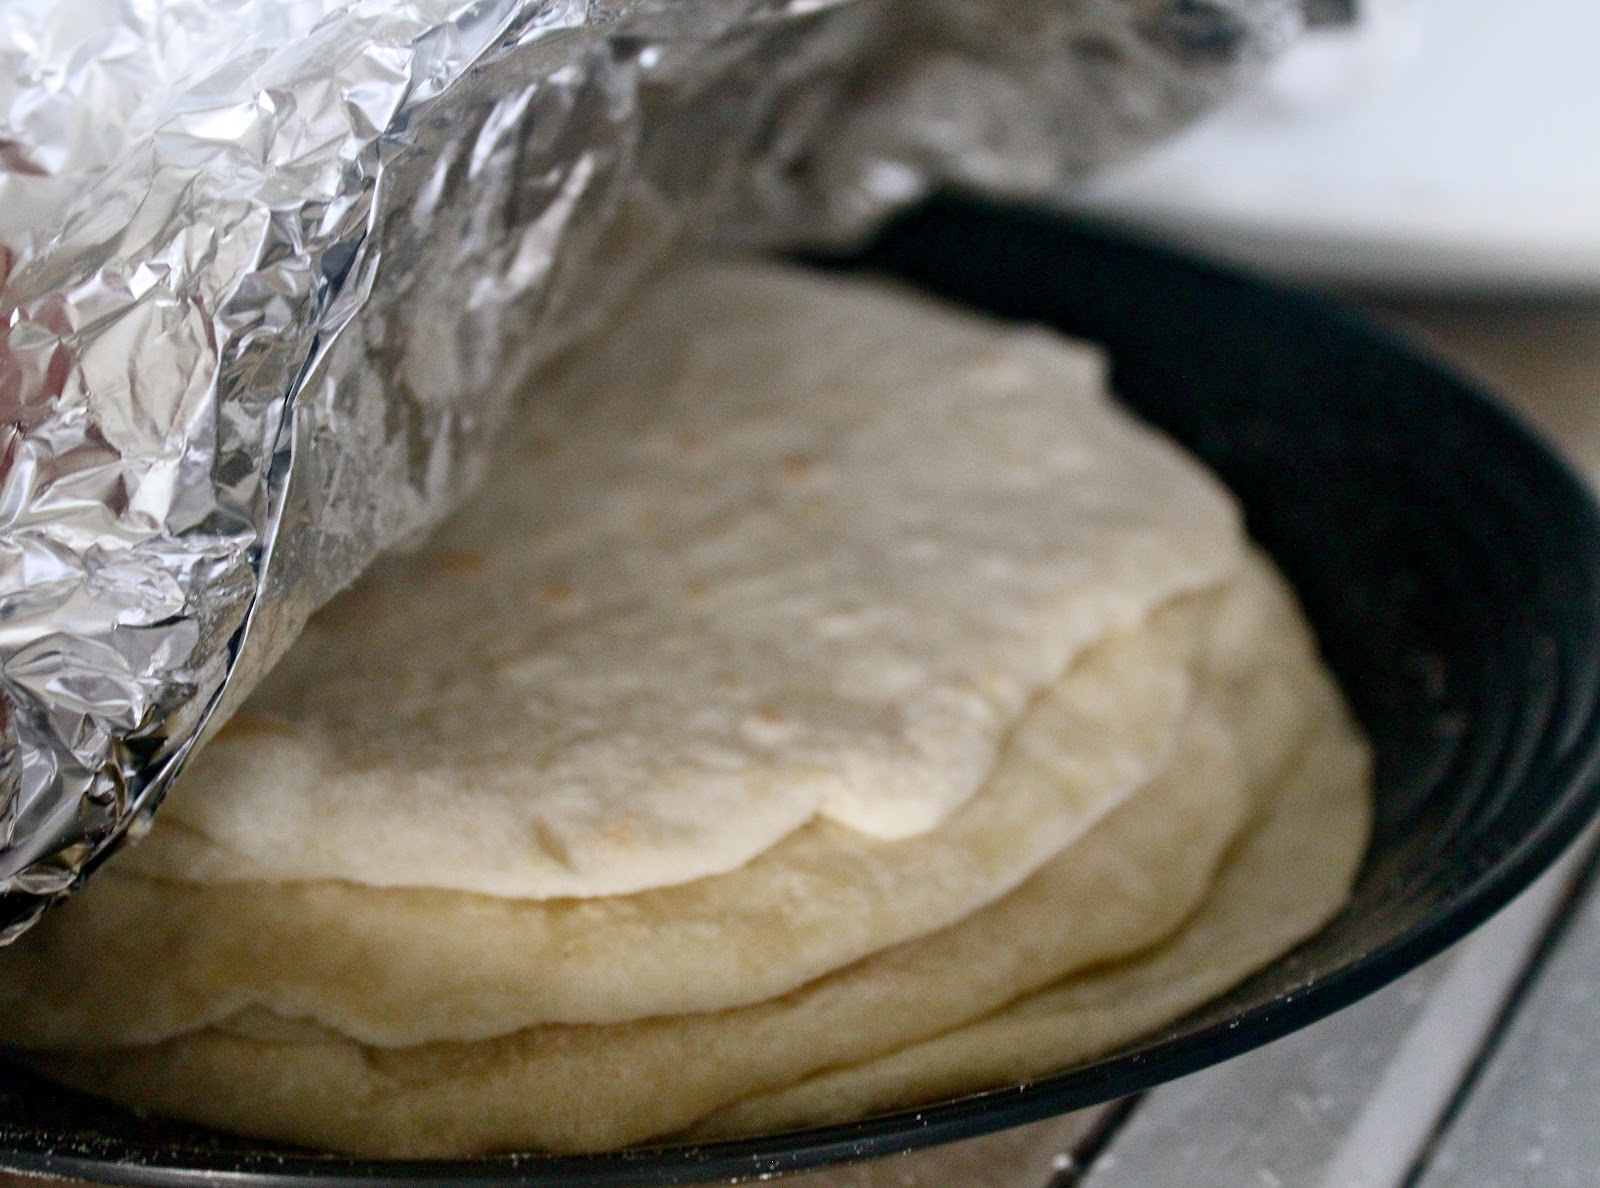
Cook on an ungreased skillet about 1 minute per side or until tortilla starts to bubble. Place on a plate and cover with foil. This will help keep them nice and warm until you are ready to serve them.
 
I had a friend ask me to post my recipe with a tutorial. So here it is: 


Make your dough. After you have let it sit, roll into balls just a little bigger than a golf ball.


Take one of your dough balls and flatten it out on a floured surface. 
Turn to cover with flour.


Roll out into a circular shape


Over medium heat, place tortilla on skillet. Cook until you start to see bubbles 
(about 1 minute or so per side). When you see bubbles, flip it over. 


I usually have a system going where I am rolling out the next tortilla
while the other is cooking. If you do this, make sure to watch the cooking tortilla.
Do not overcook!!! If your tortillas are dry or hard you have over cooked them. 


Place cooked tortilla on a plate and cover with foil. 
This will help them stay warm until you are ready to use them. 


Enjoy!

Pin It!

May 31, 2012

Mini Frittatas


I had planned to make a breakfast casserole for a baby shower that I was helping with. But I couldn't find some of the ingredients. We are limited with our resources here. So, I had to resort to a plan B. At the time, I wasn't really sure what that was. Then I had remembered I saw a photo floating around on pinterest that had eggs in a muffin tin. I thought I would attempt to make something from that idea. I mixed all of my ingredients together and threw them in a muffin tin. I was a little nervous, not following a recipe and unsure of how the end result would turn out- especially making it the morning of the shower. Luckily, they turned out and tasted divine, especially topped with a dollip of salsa! Is it just me or is everything so much cuter when it is in mini form? Simply perfect for a brunch.

After I made them I thought, this would also be a great breakfast for school days as well. Throw the stuff together the night before, or at least have all of your chopping and shredding done, and then just bake them in the morning! Enjoy!


Mini Frittatas


12 eggs
3/4 cup milk
1 cup pepper jack cheese, shredded
5 slices deli ham, diced
1/2 medium sized green pepper, chopped
green onions, chopped
hand full of fresh cilantro, chopped
1/2 teaspoon salt
1/2 teaspoon pepper
crushed red pepper flakes, just a few shakes - depending on how much heat you like.

Preheat oven to 350 degrees. Spray muffin tin with cooking spray.

In a large bowl, beat eggs and milk. Add cheese, ham, green pepper, green onions, cilantro, salt, pepper and crushed red pepper flakes.

Fill muffin tin with egg mixture. Bake for 40-50 minutes or until tops of frittatas are nice and golden brown. Take a knife and slide it around each egg. Carefully remove frittata from pan. Serve hot.


*When I made these, I filled each muffin tin to the very top with the egg mixture. And it made 12 muffin sized frittatas. I am sure you could just fill them 1/2- 3/4 of the way full and get about 20 out of the batch.


Pin It!

May 17, 2012

Marinated Tuna with Garic Lime Sauce


This is one of our family's favorite dishes, hands down. I came up with it during my first attempt at cooking fish. Yes, I had never cooked fish during the first 7 years of our marriage. I really didn't love fish and I had no idea how to cook it. Shortly after moving to Dominica, I got brave and bought some fresh yellowfin tuna from the beach (it doesn't get fresher than that).  I decided to attempt to make something with it and the flavors came together beautifully. I changed up a few recipes I use to make our favorite lime chicken. Let me tell you, it was divine. There is just something about that garlic lime cream sauce that adds a bit of perfection to the fish. I was not a huge fan of fish before coming to Dominica. But this recipe changed my ways! Yes, we are all huge fish eaters here and our kids love this dish. For those of you who aren't fish fans, or for those of you who are scared to cook fish, make this recipe. It is actually really easy. And doesn't take too long to throw together. I usually make my sauce while the fish is cooking. I promise you will love it! 


Garlic Lime Ginger Tuna Marinade
Adapted from Jen's Lime Chicken recipe


1/4 cup Sprite or 7-up
1/2- 3/4 cup lime juice
1/4 cup Worcestershire sauce
1/4 cup soy sauce
1-2 tablespoons brown sugar
3 garlic cloves, minced
2 tablespoons fresh ginger, minced
black pepper

Marinate 1-2 hours. Grill

Garlic Lime Cream Sauce
Adapted from Emeril Lagasse


1/2 cup Sprite or 7-up
2 tablespoons freshly squeezed lime juice
2 tablespoons shallots, minced (I have used green onions when I couldn't find shallots)
1 teaspoon garlic, minced
1 teaspoon fresh ginger, minced
1 tablespoon fresh cilantro, chopped
1/2 teaspoon salt
3 turns freshly ground black pepper (if you don't have a pepper grinder just add a few shakes)
1/4 cup heavy cream
8 tablespoons butter (1 stick), cut up, at room temperature
Esscence Seasoning, to taste (I found this at Wal-Mart, but if you don't have this, see bottom for recipe)


Combine the soda, lime juice, shallots, garlic, cilantro, salt, pepper and Esscence seasoning in saute pan over high heat and bring to a boil. Reduce by half. (Or just boil for about 7 minutes).  Stir in the cream and simmer for 3 minutes. Whisk in the butter and remove from the heat. Continue whisking until all of the butter is incorporated. Garnish with chopped green onion. Serve over grilled Garlic Lime Ginger Tuna.

*Note: Evaporated milk can be substituted for the heavy cream. I have made it with both and it does not affect the taste or texture.


Emeril's Esscence Seasoning


2 1/2 tablespoons paprika
2 tablespoons garlic powder
1 tablspoon black pepper
1 tablespoon onion powder
1 tablespoon cayenne pepper
1 tablspoon dried leaf oregano
1 tablespoon dried thyme

Combine all ingredients and store in an airtight jar or container.
Pin It!

Apr 10, 2012

Mushroom Marinara Sauce


Spaghetti is one of those super easy meals that makes a frequent appearance at our house. For two reasons- it is an inexpensive meal and it is quick and easy to throw together! Seriously, I can have a good dinner ready in under 30 minutes! I am not talking open up a can of spaghetti sauce, I am talking- yummy homemade spaghetti sauce! It has seemed like life is so crazy lately, and a few nights out of the week we are getting home late and need some quick easy meals to be able to throw together.

I have been searching for the perfect marinara sauce recipe for quite some time. I have tried a lot of different recipes that have been ok, but none that have wowed me. I have tried a few different combinations and thrown in a few different things in my attempt to make a great marinara sauce. I am really picky when it comes to spaghetti. I'm not a big fan of store bought spaghetti sauce. And I hate it when the noodles are overdone. Seriously, it is amazing how much of a difference it makes when you have a great sauce and perfectly "al dente" noodles!

The other night I think that I finally came up with a winning combination! I threw in some mushrooms and I think that made all the difference! This comes together so fast and tastes wonderful! It would be perfection topped with a few Italian meatballs!

Mushroom Marinara


3 Tablespoons EVOO
4 Tablespoons butter
1 medium onion, diced (or 2 small onions)
3 teaspoons garlic
1- 8 ounce container mushrooms, sliced
1/3 cup grated Parmesan cheese
1- 14.5 ounce can diced tomatoes
1- 6 ounce can tomato paste
1- 15 ounce can tomato sauce
1/8 cup beef broth
1/2 teaspoon Better Than Bouillon Chicken Flavor
1 1/2 teaspoons balsamic vinegar
2 Tablespoons brown sugar
salt
pepper
crushed red pepper

In a large sauce pan heat EVOO and butter over medium heat. Saute onions and garlic. Cook about 2 minutes then add in the mushrooms. After the mushrooms are sauteed to perfection, turn off heat and stir in Parmesan cheese.

In a blender, combine diced tomatoes and tomato paste. Blend. I don't puree mine completely, I like it a little chunky. Then add tomatoes to mushroom/cheese mixture and heat over medium heat. Add tomato sauce, beef broth, chicken bouillon, balsamic vinegar, and brown sugar. Add salt, pepper, and crushed red pepper to taste. {Depending on how much heat you want depends on how much crushed red pepper to add. I usually shake a few shakes in.} Simmer for 15- 30 minutest. Serve!

Pin It!

Feb 8, 2012

Cheese Rolls with Parmesan Crust


I first made these rolls on Father's Day last year. I found the recipe while perusing through Mel's recipes. Seriously, it's my go to website when I am in need of something new! Let me just say that I am OBSESSED with these rolls! They are amazing! Won the hubs over too! It is a homemade roll filled with Pepper Jack goodness and topped with buttery Parmesan! Oh my, I don't think it could get any better than that! They were a hit! I followed the recipe to a 'T' and they came out perfect! Quite possibly one of my favorite foods to eat... and they were super easy to make!


Cheese Rolls with
Buttery Parmesan Crust
from Mel's Kitchen Cafe


INGREDIENTS:
Dough:
4 1/2 teaspoons instant yeast
1/2 cup warm water
1 cup lukewarm milk
1 large egg, lightly beaten
1/4 cup butter, softened
1/3 cup sugar
1 teaspoon salt
5-6 cups unbleached all-purpose flour
Filling:
8 ounces cheddar or pepperjack cheese, cut into 15 cubes
Topping:
2 tablespoons butter
1/4 cup Italian-flavored bread crumbs
1/4 cup grated parmesan cheese
1 egg yolk beaten with 1 tablespoon water

DIRECTIONS:
For the dough, combine all the ingredients and mix and knead until you have a soft, elastic dough (don’t add too much flour – the key to soft dinner rolls is a soft dough!). Place the dough in a lightly greased bowl and cover, letting rise in a warm place for 20-30 minutes.
Prepare a 9X13-inch pan by lightly greasing the bottom and sides with butter or nonstick cooking spray. Deflate the dough and divide into 15 pieces. Shape the pieces of dough into rounds and punch a cube of cheese from the bottom up into the center of each piece. Pinch the dough tightly together to close the bottom. Place the rolls, pinched side down, in the prepared baking pan. Cover and let rise again for another 15 to 20 minutes, or until nearly doubled.
While the rolls are rising, melt the butter and stir in bread crumbs and parmesan cheese. Set aside.
Preheat the oven to 375 degrees. When the rolls have risen, brush the tops with the egg yolk beaten with water. Sprinkle tops of rolls liberally with the bread crumb mixture. Bake for 15 to 18 minutes, until the tops of the rolls are nicely browned. Remove from the pan immediately and cool on a rack. Serve warm.
Pin It!

Nov 27, 2011

Amazing Dinner Rolls


So I was in charge of bringing the rolls to our Thanksgiving dinner. Truth be told... I have only made rolls from scratch maybe three times - EVER! The times I have made them they haven't really turned out. Not sure if it was the recipe or me? So making rolls for a crowd at Thanksgiving was a bit intimidating. Luckily, I came across this amazing recipe. These rolls were light, fluffy and buttery! And they will probably be making a weekly appearance at our table! I doubled the recipe and it came out great with 36 beautiful rolls. The original recipe used a bread machine, which I didn't have- so I changed it up to make it work without.

Sweet Dinner Rolls 
(slightly adapted from allrecipes.com)


1/2 cup warm water
1/2 cup warm milk
1 egg
1/3 cup butter, softened
1/3 cup white sugar
1 teaspoon salt
3 3/4 cups all-purpose flour
1 (0.25 ounce) package active dry yeast
1/4 cup butter, softened

Pour warm milk and water into a bowl, add sugar to dissolve, then add yeast. Allow to proof for about 20 minutes until creamy foam appears. Add 1/3 cup butter and salt, mix. Add egg, mix to combine. Add flour a cup at a time, after each cup mix with a hand held mixer (I'm sure a Kitchen Aid mixer would work just as well but we our resources are limited here). Knead for a good 10 minutes. Allow to rise for 45 minutes in a warm area, covered.

Turn dough out onto a lightly floured surface. Divide dough in half. Roll each half into a 12 inch circle, spread 1/4 cup softed butter over entire round. Cut each circle into 8 wedges. Roll wedges starting at wide end; roll gently but tightly. Place point side down on ungreased cookie sheet. Cover and put them in a warm place, let rise 1 hour. Meanwhile, preheat oven to 400 degrees.

Bake in preheated oven for 10-15 minutes or until golden. Take rolls out and rub butter over hot rolls.

Enjoy!
Pin It!

Sep 23, 2011

Stuffed Pizza Crust


Tonight I had planned to make pizza. It was just going to be a basic pizza, marinara, cheese, olives, pepperoni, onion... nothing special. I tried a new pizza dough recipe and since I don't have my pizza stone here in Dominica, I was left to use my cookie sheet. The recipe said it made two medium sized pizzas. It wasn't enough to half it in the pan, but when I rolled the whole thing of dough into the pan it ended up being a little too much. Since it was already in the pan, I had an idea to use the excess dough into a stuffed crust. That transformed this basic pizza into something fun and out of the norm! The garlic butter Parmesan glaze topped it off perfectly! (Thanks to the hubs for thinking of adding that goodness to it!) It was delicious and filling. I think I am going to initiate Fridays as PIZZA night. It goes so perfectly with my Friday night movie dates with Crew! 


Homemade Stuffed Crust Tutorial

Make your pizza dough according to the recipe. I used this one from Annie's Eats and substituted 2 cups of whole wheat flour. It made the perfect amount to make the stuffed crust in a cookie sheet sized pan. 

Roll out your dough and place in pan. Stretch with hands to make sure the dough is evenly distributed.  There should be an excess of about an inch of dough hanging off of the edge. 

Place a good amount of cheese around the very edge of the pan. 


 Fold over excess dough and press it down.


Make sure it is pressed down completely all the way around.

At this point you can add your sauce and toppings.

Then melt about 3 tablespoons of butter. Mix with about 1-2 teaspoons of minced garlic. Brush it onto the crust and top with a good amount of Parmesan cheese.


Ready to be baked.


Enjoy!
Pin It!